Welcome to your go-to guide on using concrete for pavers in NZ. Whether you’re upgrading your driveway, adding a garden path, or planning a backyard patio, concrete pavers offer a durable, cost-effective option that fits New Zealand’s diverse weather conditions. In this post, you’ll learn about the different types of concrete used for paving, how they compare to other materials, what the installation process looks like, and how to keep your pavers looking great for years. Whether you’re a DIY enthusiast or hiring a pro, this guide will help you make smart decisions for your next outdoor project.
The best concrete for pavers in NZ is precast concrete due to its strength, consistency, and low maintenance. It performs well in New Zealand’s climate and is ideal for driveways, patios, and garden paths. Poured-in-place and stamped concrete are also popular for custom designs and decorative finishes.
Table of Contents
Why Use Concrete For Pavers In New Zealand?
Concrete is one of the most popular materials for paving projects in New Zealand, and for good reason. It offers a strong mix of durability, affordability, and versatility, making it an ideal choice for a wide range of outdoor spaces. Whether you’re laying a new driveway, creating a patio, or installing a garden path, concrete pavers provide a reliable and long-lasting solution that suits both residential and commercial needs.
New Zealand’s varied climate plays a big role in why concrete works so well. From the humid North Island to the cooler and more temperate South Island, concrete holds up across all regions. It’s resistant to temperature fluctuations, rain, and UV exposure, which means it won’t crack or fade as easily as some alternative materials. For homeowners who want something that lasts through hot summers and wet winters, concrete offers peace of mind.
Another major benefit of using concrete for pavers in NZ is cost. Compared to natural stone or brick, concrete is much more affordable to manufacture and install. It delivers the same clean, modern look without the high price tag. This makes it a smart choice for large areas like driveways or patios, where using more expensive materials would significantly increase costs.
Concrete also allows for a high level of customization. You can choose from a variety of colours, finishes, and patterns to suit the look of your property. Whether you want a textured surface to prevent slips or a decorative design that mimics stone or tile, concrete gives you that flexibility. It’s easy to match your existing landscaping or architecture, whether you’re going for a modern, traditional, or rustic appearance.
So, where does concrete perform best? The answer is just about anywhere outdoors. It’s commonly used for driveways because it can handle the weight of vehicles without shifting. Patios benefit from concrete’s even surface and easy maintenance. Garden paths made from concrete pavers stay level, drain well, and blend into the landscape with ease. It’s this all-around performance that makes concrete a go-to choice for Kiwi homeowners looking for something practical, attractive, and built to last.
Types Of Concrete Used For Pavers
When planning your paving project in New Zealand, choosing the right type of concrete matters. Each option offers different benefits depending on the look you want, the location of the pavers, and your budget. Here’s a breakdown of the most common types of concrete used for pavers across NZ.
Precast Concrete Pavers
Precast concrete pavers are made in controlled factory environments and delivered to your site ready to install. Because they’re mass-produced, you can expect consistent shape, size, and finish. This makes them a top choice for driveways, walkways, patios, and other projects where clean lines and uniformity matter. They come in various colours and textures, often mimicking the look of brick or stone. Their strength, reliability, and ease of installation make them one of the most popular options for residential use in New Zealand. You’ll find these pavers at most local landscape supply stores like Firth or Urban Paving.
Poured-In-Place Concrete
Poured-in-place concrete is mixed and poured directly onto the site, then formed into shape before it sets. This option is ideal for more custom designs, curved paths, or irregular shapes that don’t suit standard-sized pavers. It’s commonly used for garden borders, stepping stones, and edge detailing. However, this method requires more labour, planning, and site preparation. It also involves a longer drying and curing time. While the results can be impressive, it’s best handled by experienced professionals if you want a long-lasting finish.
Stamped Or Decorative Concrete
Stamped concrete gives you the flexibility to create a high-end look without the high-end materials. During installation, the concrete is stamped with patterns that resemble stone, brick, tile, or even wood. This technique adds visual appeal to outdoor areas like patios, pool surrounds, and entrance paths. Decorative concrete is especially popular in NZ properties aiming for a modern or rustic look. While it costs more upfront than standard concrete, its durability and style make it a worthwhile investment. You can source this service from paving specialists such as Premier Group or Auckland Decorative Concrete.
When choosing a concrete type for your project, think about the final appearance you want, your budget, and how much wear and tear the area will get. Each type has its own strengths, and with the right supplier or contractor, you can achieve a durable and attractive result that suits your space.
Comparing Concrete To Other Paving Materials
When planning a new driveway, patio, or garden path in New Zealand, choosing the right paving material matters. Each option, concrete, brick, asphalt, and natural stone, comes with its own advantages and trade-offs. To help you make the right decision, here’s a side-by-side look at how concrete compares to the others in terms of cost, durability, looks, and maintenance.
- Brick Pavers are known for their classic, timeless look. They’re made from clay and tend to be more expensive than concrete, both in material cost and installation. Brick is durable but can chip or crack under heavy pressure or poor drainage. It’s ideal for those who want a rustic appearance, but ongoing maintenance is needed to keep weeds and moss from growing between the joints.
- Asphalt is a lower-cost option, especially for larger driveways. It’s quick to install and provides a smooth, dark surface. However, it doesn’t offer much visual appeal and typically has a shorter lifespan than concrete or brick. Asphalt needs regular resealing and tends to soften in hotter areas, which may be a concern in some parts of New Zealand during summer.
- Natural Stone offers unmatched beauty and variation in colour and texture. Materials like bluestone, granite, or slate bring a premium look to any outdoor space. That said, they’re usually the most expensive choice, both in terms of materials and the labour needed for installation. Natural stone also requires sealing and may become slippery when wet if not textured properly.
- Concrete, in comparison, hits a practical balance. It’s affordable, easy to work with, and performs well in a range of climates across NZ. You can choose between precast pavers or poured concrete, and even customize the look with stamping, colouring, or exposed aggregate. Concrete typically lasts 20–30 years with proper care and doesn’t need the frequent sealing or weed removal that brick or stone might. It offers more design options than asphalt and costs less than natural stone.
- But concrete isn’t perfect for every situation. It may crack over time, especially if the base layer isn’t properly prepared. Poor drainage or heavy root growth underneath can also lead to uneven surfaces. In areas with frequent freeze-thaw cycles or very heavy vehicle traffic, reinforced or thicker materials might be more suitable.
Overall, for most Kiwi homeowners, concrete provides the best value for money. It’s flexible in design, cost-effective to install, and durable enough for everyday use. If you want a balance between visual appeal and practicality, concrete remains one of the top choices for paving in New Zealand.
Installation Process: What To Expect
If you’re planning to install concrete pavers in New Zealand, knowing the full process can help you avoid costly mistakes and set realistic expectations. Whether you’re doing it yourself or hiring a professional, the steps below outline how a quality paver installation comes together. This guide walks you through the essential phases: from preparing your space to sealing the surface. Understanding each step ensures your pavers last longer, look better, and handle the NZ climate effectively.
Site Preparation
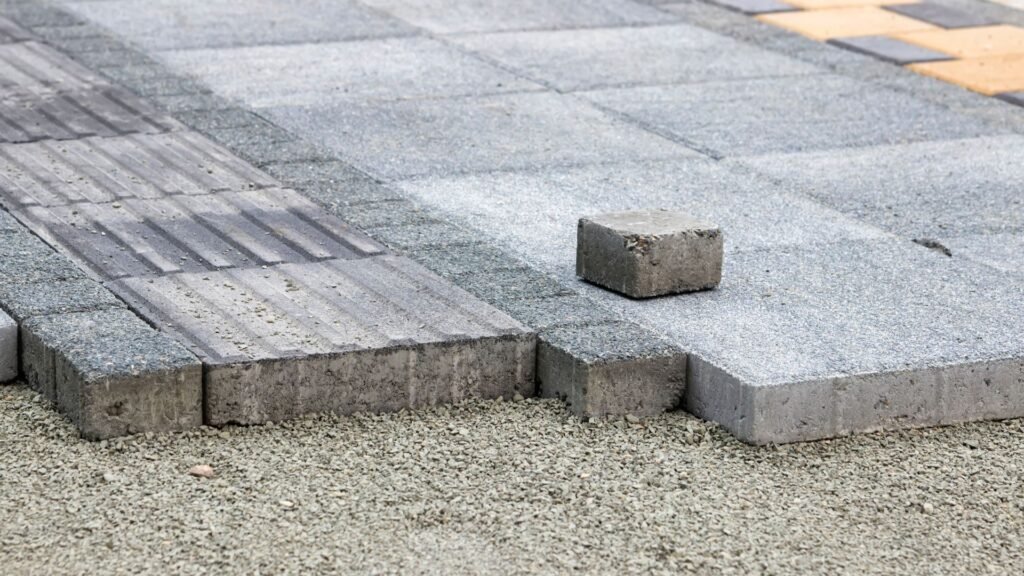
Every successful paving project begins with proper site prep. This means marking out the area where your pavers will go and clearing it of grass, roots, rocks, or old paving. You’ll need to dig to the right depth, usually about 150–200mm depending on the type of pavers and the amount of foot or vehicle traffic. The goal is to create a stable foundation, so taking the time to level the area and ensure proper drainage is key. In wetter regions of NZ, drainage matters even more to prevent shifting or sinking.
Base Layer (Gravel, Sand, Etc.)
Once the area is clear, it’s time to lay the base. This typically includes two layers: a sub-base of compacted gravel (like GAP 40 or GAP 20) and a finer layer of sand (such as washed bedding sand) on top. The gravel provides a strong base and helps with drainage, while the sand helps level the pavers and allows slight movement. Compacting the gravel base using a plate compactor is crucial, it gives your pavers a solid, even surface to sit on. Don’t skip this step or your pavers might shift over time.
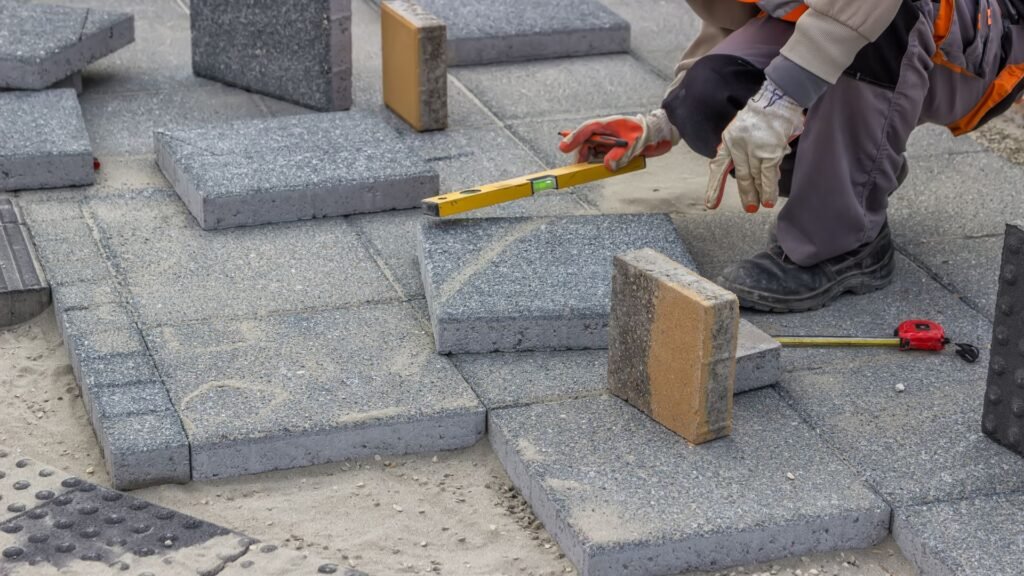
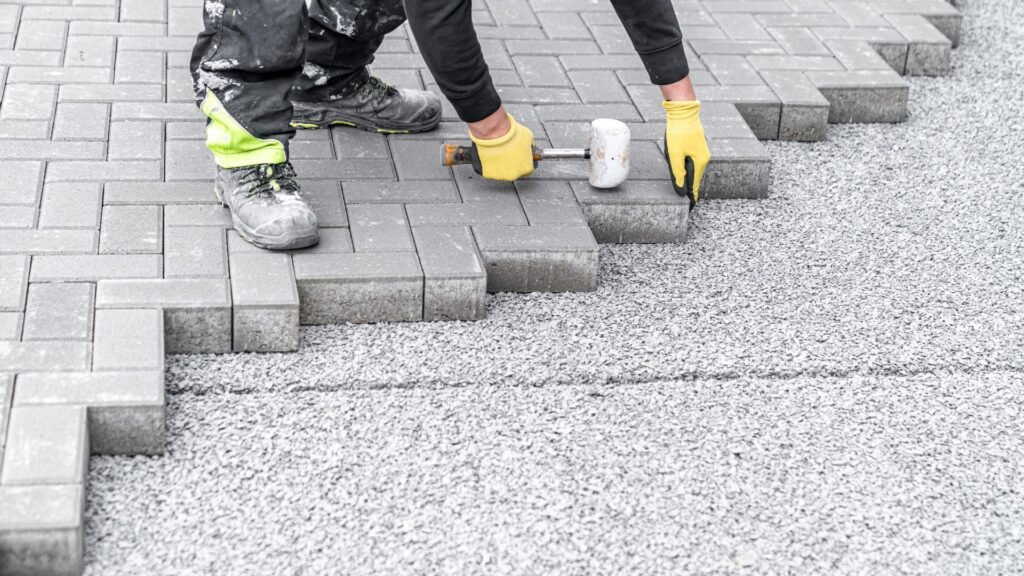
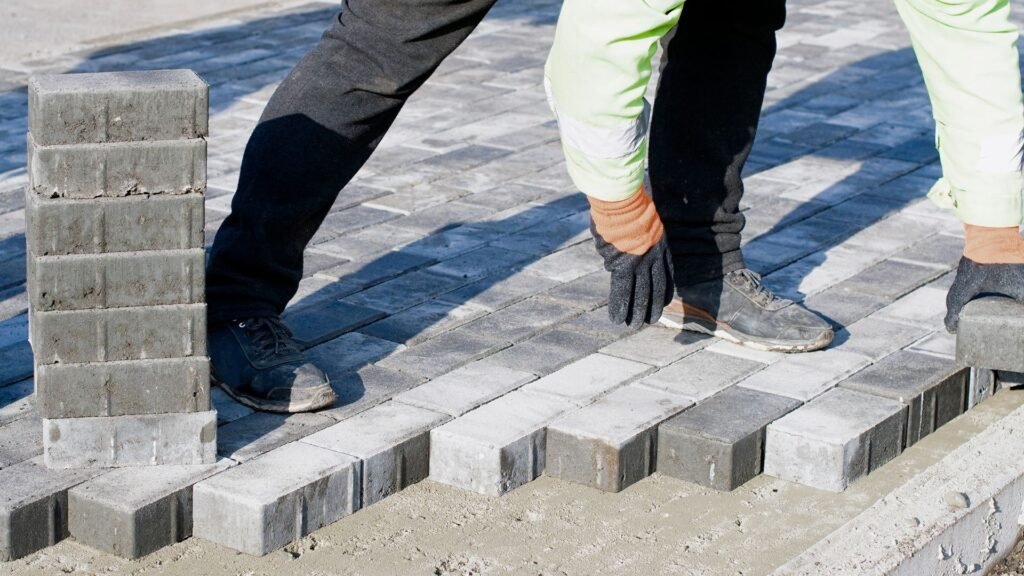
Laying Pavers
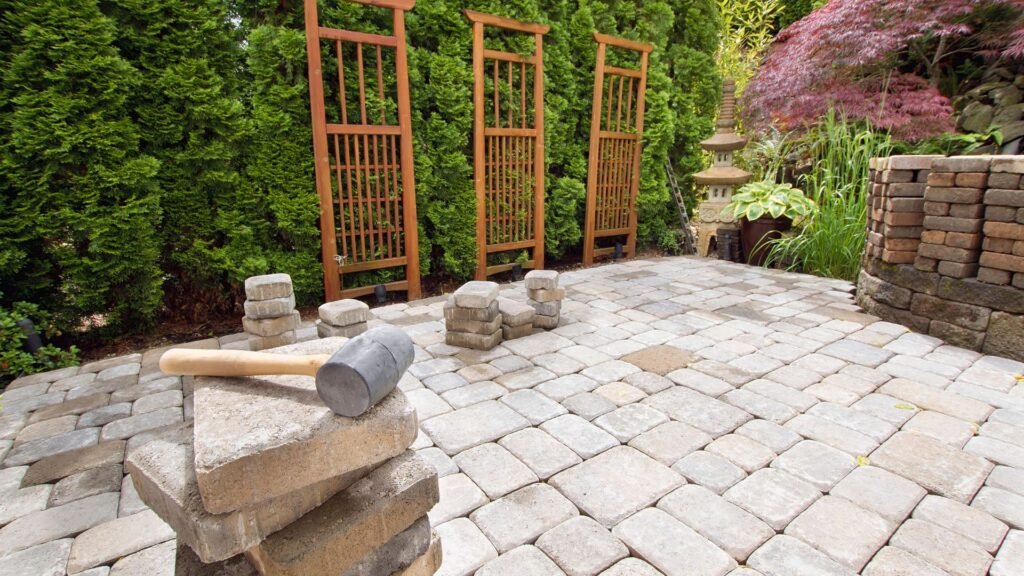
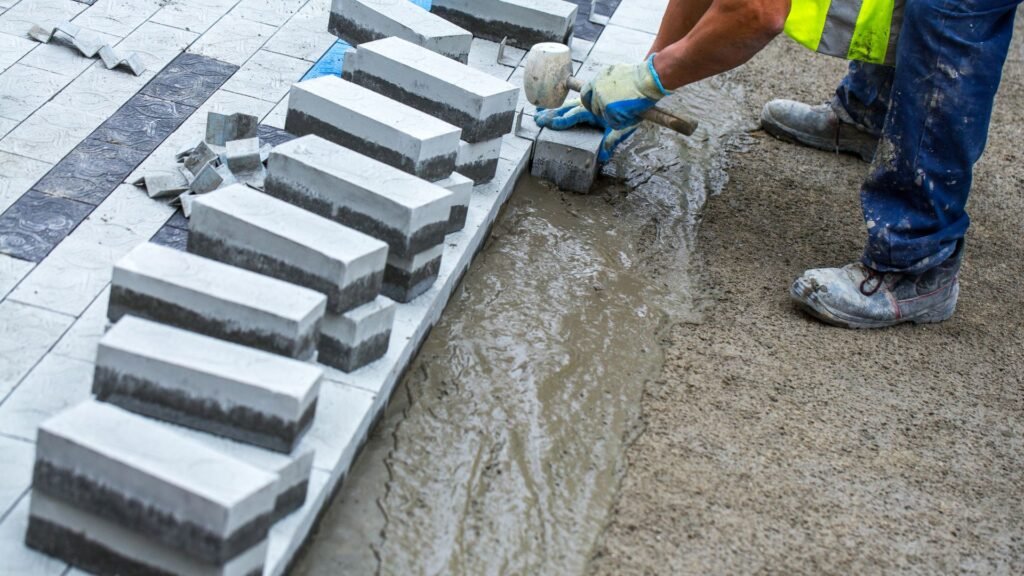
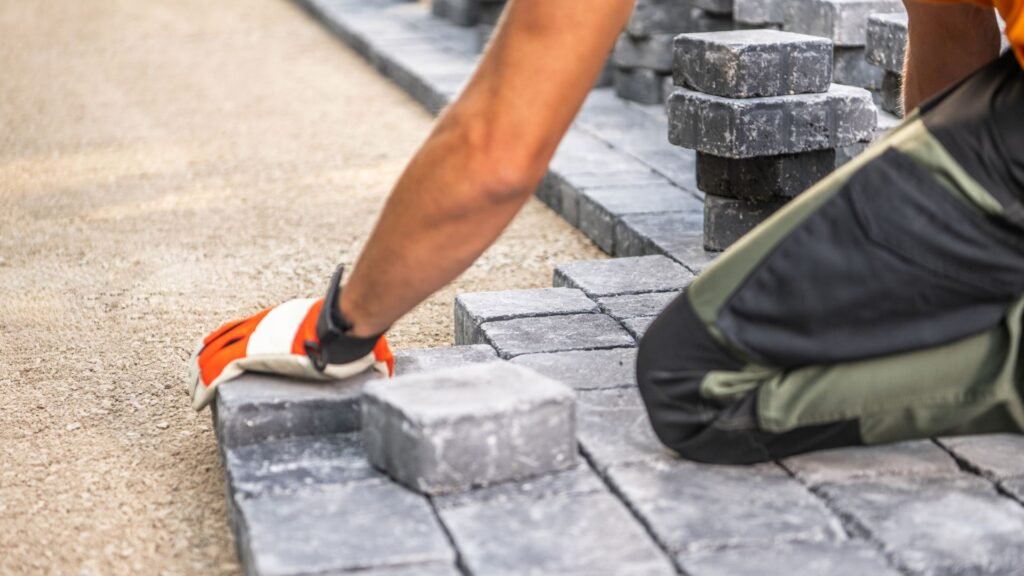
With the base set, you can start placing the pavers. Begin from one corner, preferably along a straight edge like a wall or string line. Lay each paver gently into the sand, making sure they sit level and evenly spaced. Use a rubber mallet to tap them down if needed. If your design includes curves or borders, you may need to cut some pavers to fit. A concrete saw or angle grinder with a diamond blade works best. Take your time here, how you lay the pavers will define the final look and stability of your surface.
Jointing Sand / Sealing
After all the pavers are in place, the next step is to apply jointing sand. This helps lock the pavers together and keeps weeds from growing in between. Sweep fine sand or polymeric sand into the joints until they’re full. Then, run a plate compactor over the surface again to settle the pavers and sand. You might need to top up the sand after compacting. Sealing the pavers is optional but recommended for NZ conditions. A good sealant protects against moisture, stains, and fading from UV rays. It also makes cleaning easier.
DIY Vs. Hiring A Pro (Cost, Tools, Time)
You can install pavers yourself if you’re confident with basic tools and are willing to put in the labour. DIY is more affordable, you’ll mainly pay for materials and possibly equipment hire, like a compactor or saw. Expect to spend 2–4 days for an average-sized area. Hiring a pro will cost more upfront, but saves time and often results in a cleaner finish. Professionals also know how to deal with tricky terrain, drainage issues, or custom layouts. For driveways or large patios, hiring an expert is usually the better long-term investment.
Time Required From Start To Finish
The time to complete a concrete paver project depends on the area size, weather conditions, and your experience level. A basic patio or path might take a weekend for a skilled DIYer. A driveway or complex pattern could take 3–5 days with help. If you’re using a contractor, many jobs are done within a week, depending on their schedule. Planning ahead and having all materials ready can help speed things up. Also, consider weather, NZ’s rain-prone climate can delay outdoor projects, especially if you don’t have cover.
By understanding each step in the installation process, you’ll be better prepared to plan, budget, and get a result that lasts for years. Whether you take the DIY route or bring in a contractor, a properly installed concrete paver surface adds long-term value and function to your property.
Maintenance Tips To Keep Concrete Pavers Looking Great
Concrete pavers are built to last, but they still need regular care to stay in top shape. Whether your pavers are in the driveway, garden path, or patio, proper maintenance will help them look clean, safe, and well-kept for years. Here’s how to keep your concrete pavers in excellent condition in New Zealand’s changing weather.
- Cleaning Schedule: Seasonal Or After Storms
Dirt, leaves, and grime can build up fast, especially during winter or after heavy rainfall. A good rule of thumb is to clean your pavers at the start of each season. Use a stiff broom to sweep away debris and a garden hose or pressure washer to remove surface dirt. After storms, do a quick rinse to clear away mud, silt, or leaves. This stops the buildup and keeps the surface from becoming slippery or stained. If moss or algae appear, scrub with a mix of water and mild detergent or white vinegar to remove them safely. - Sealing: Why And When To Do It
Sealing your concrete pavers helps protect them from stains, moisture, UV rays, and wear. It also enhances the colour and gives them a clean, finished look. In most NZ climates, sealing once every 2 to 3 years is enough. If your area gets lots of rain or strong sun, consider sealing more often. Always clean the surface first and make sure it’s completely dry before applying the sealant. Choose a breathable, weather-resistant sealer made for concrete. Avoid over-sealing, as it can trap moisture and lead to damage. - Preventing Weeds, Moss, And Stains
Weeds growing between pavers not only look bad but can also shift them out of place over time. Use polymeric sand in the joints to harden and block weed growth. For existing weeds, pull them by hand and apply a vinegar-based solution. Moss and algae grow in damp, shady spots. Improve drainage, trim overhanging plants, and keep the area clean to reduce moisture buildup. To prevent stains from oil, rust, or food spills, clean them as soon as they happen. Avoid using harsh chemicals that can damage the concrete surface. - How To Replace Cracked Or Broken Pavers
Concrete pavers are tough, but they can still crack under pressure or shift due to ground movement. Replacing a single damaged paver is simple if the rest are intact. First, remove the joint sand around the broken piece. Use a flat screwdriver or chisel to lift it out. Clean the space, level the base if needed, and place a matching paver in the same spot. Add joint sand and compact it into place. Doing this early prevents one crack from turning into a bigger repair job.
By following these maintenance tips, your concrete pavers will stay clean, strong, and great-looking through every season. Consistent care not only protects your investment but also keeps your outdoor space safe and appealing.
Cost Breakdown In New Zealand
When planning to use concrete for pavers in New Zealand, understanding the cost breakdown helps you make informed decisions. The total cost can vary depending on the type of concrete used, site conditions, and whether you choose to DIY or hire professionals. Here’s what you need to know.
Average Cost Per m² (NZD Ranges)
In New Zealand, the average cost for concrete pavers typically ranges between $60 to $150 per square metre, depending on quality, style, and finish. Precast concrete pavers generally sit at the lower end of the scale, while decorative or stamped concrete options push the cost higher. If you include edging, sealing, or more complex designs, the price can rise further. Always ask for a detailed quote to ensure you’re comparing full job costs, not just base materials.
Labour, Materials, And Prep Costs
Labour is often the biggest cost after materials. On average, labour may cost $40 to $80 per square metre, depending on job complexity and location. Urban areas like Auckland or Wellington may see higher rates due to demand. Material costs include the pavers themselves, bedding sand, compacted gravel, and any sealants used. Site preparation also matters, if your space needs excavation, leveling, or drainage, this adds to the cost. Expect prep and material costs to add another $20 to $40 per square metre.
How Different Types Affect Pricing
The type of concrete you choose impacts pricing significantly. Precast pavers are generally more affordable because they are mass-produced and quicker to install. They offer consistent size and quality, making them ideal for straightforward paths and patios. Poured-in-place concrete, while offering more design flexibility, tends to be more expensive. It requires formwork, skilled labour, and longer curing time, which raises labour and material costs. Stamped or decorative concrete comes with even higher costs due to the added techniques and finishes involved.
Budgeting Tips For Homeowners
To stay within budget, start by measuring your space carefully and calculating your square metre needs. Always factor in 5–10% extra material to cover mistakes or future repairs. If you’re on a tight budget, choose standard precast pavers and keep the layout simple. Hiring professionals might cost more upfront, but it can save time and avoid costly mistakes. Ask for multiple quotes and request a breakdown that separates labour, materials, and prep so you can compare fairly. Lastly, plan your project during the off-season if possible, some contractors offer better rates during quieter months.
By understanding the full cost breakdown, you can plan your concrete paving project in New Zealand with fewer surprises and more confidence.

Common Mistakes To Avoid
When working with concrete pavers in New Zealand, the quality of your results depends on more than just choosing the right materials. Even the best pavers can fail if installation mistakes are made. Here are five common errors you should avoid to save time, money, and frustration.
Poor Site Prep
Skipping proper site preparation is one of the most frequent causes of uneven or sinking pavers. The ground must be cleared of debris, leveled, and compacted before any base materials are laid. Without a stable and level foundation, pavers may shift over time or collect water in low spots. Always remove soft soil, roots, or clay, and make sure the base layer is compacted thoroughly to avoid long-term issues.
Wrong Concrete Mix Or Base Layer
Using the wrong concrete mix can weaken your pavers and reduce their lifespan. In NZ’s varied climate, the mix must be strong enough to handle freeze-thaw cycles, heavy rain, and UV exposure. If you’re pouring concrete, aim for a mix designed for outdoor paving. For precast pavers, make sure the base layer (typically compacted gravel and sand) is deep enough and properly graded. Cutting corners here often leads to cracked or unstable surfaces.
Not Sealing Or Maintaining
Many people think concrete pavers are maintenance-free, but they still need care to stay in good shape. Sealing your pavers protects against moisture, oil stains, and colour fading caused by sun exposure. It’s especially important in areas with heavy foot or vehicle traffic. Neglecting this step can lead to discoloration, moss growth, and erosion of the surface. Resealing every few years keeps your paving looking fresh and helps prevent long-term damage.
Rushing The Curing Process
Concrete needs time to cure properly, and rushing this stage is a recipe for failure. Whether you’re installing poured concrete or using mortar for joints, curing too fast can cause cracking or weak spots. Concrete should be kept moist and undisturbed for several days to achieve full strength. This might seem inconvenient, but patience during curing is essential for lasting durability.
Hiring Unqualified Installers
Not all contractors have the same level of experience with concrete pavers. Hiring someone without proper skills or credentials can lead to poor workmanship, unexpected costs, and unsafe results. Before signing any agreement, ask for examples of previous work, read reviews, and confirm they understand NZ’s local conditions and council requirements. A qualified installer will ensure the job is done right the first time.
Avoiding these common mistakes helps you get the most value from your investment. With the right preparation, materials, and team, your concrete pavers will stay strong and attractive for years to come.
Is Concrete The Right Choice For You?
Before you commit to using concrete for your pavers, it’s worth stepping back and looking at the full picture. Concrete is a solid choice for many homes in New Zealand, but it isn’t always the best fit for every project or budget. Below are key questions to help you decide if concrete pavers are right for your space and needs.
What’s Your Budget?
Concrete is known for being more affordable than natural stone or brick. Precast concrete pavers, in particular, offer a balance between cost and durability. But it’s still important to factor in labour, preparation, and finishing costs. If you’re planning a large space or want decorative finishes like stamping or staining, your costs can quickly increase. Make sure to get a clear quote if you’re hiring a contractor, and compare it with other material options.
How Much Foot Or Vehicle Traffic Will It Get?
If you’re paving a driveway, durability is key. Concrete pavers are strong enough to handle vehicle weight, especially when installed correctly over a compact base. For walkways or garden paths, strength still matters but aesthetics might take priority. Think about the daily wear and tear, kids, bikes, lawn gear, or heavy vehicles, and match the material to your lifestyle.
Do You Want A Modern Or Rustic Look?
Concrete is versatile. It can be formed, coloured, or textured to mimic stone, tile, or brick. If you prefer a clean, modern look with sharp lines and consistent shapes, concrete pavers deliver. But if you’re after a rustic, natural feel, stone or clay bricks might align better with your style. Some homeowners mix concrete with other materials to get the best of both worlds.
Final Pros And Cons Overview
Pros:
- Affordable and widely available in NZ
- Easy to shape, size, and customize
- Durable in most climates
- Low maintenance with proper sealing
Cons:
- Can crack if not installed properly
- Might look plain without design upgrades
- Decorative options raise the price
- Can fade or stain without sealing
Alternative Options If Concrete Doesn’t Fit
If concrete isn’t checking all your boxes, consider these alternatives:
- Natural stone: Offers a unique, upscale look but comes at a higher price.
- Clay bricks: Classic and durable, with a warm, textured appearance.
- Gravel: Low cost and easy to install, but not ideal for high-traffic zones.
- Permeable pavers: Great for drainage-focused areas or eco-conscious designs.
Choosing the right material comes down to your budget, your style, and how the space will be used. Concrete works well for most NZ homeowners, but it’s not a one-size-fits-all solution. Think long-term, weigh your priorities, and pick the option that will give you the best value and finish for your space.
Ready to upgrade your outdoor space with durable, affordable concrete pavers? Visit us to explore our paving solutions and get started today.
FAQs: About Concrete Pavers In NZ
What type of concrete is best for pavers in New Zealand?
Precast concrete is the most popular choice due to its durability, consistent quality, and ease of installation. It’s well-suited for NZ’s climate and works great for driveways, patios, and walkways.
Are concrete pavers suitable for all regions in NZ?
Yes. Concrete pavers can handle the wet, cold, or coastal conditions found across NZ. Just make sure they’re installed correctly with proper drainage and sealing where needed.
How long do concrete pavers last in NZ conditions?
With proper installation and minimal maintenance, concrete pavers can last 20 to 30 years or more, even in high-traffic areas or harsh weather environments.
Do concrete pavers require sealing?
Sealing is optional but recommended. It helps prevent stains, moss, water damage, and fading, especially in damp or shaded outdoor areas.
Can I install concrete pavers myself, or should I hire a pro?
DIY installation is possible with basic tools and time. However, hiring a professional is best for large areas, driveways, or if you want a long-lasting, level finish.
How much do concrete pavers cost in NZ?
Prices vary by type and supplier. On average, expect to pay $40–$80 per square metre for materials. Including labour, costs can range from $100–$150 per m².
What is the difference between precast and poured concrete pavers?
Precast pavers are manufactured in molds and delivered ready to install. Poured concrete is mixed and shaped on-site. Precast offers more consistency, while poured suits custom designs.
How do concrete pavers compare to brick or stone?
Concrete pavers are generally more affordable and easier to install than natural stone. They offer more design options than brick and require less upkeep over time.
Can I use concrete pavers for a driveway in NZ?
Yes. Concrete pavers are strong enough for residential driveways when installed with the right base and thickness. Choose high-strength pavers rated for vehicle traffic.
How do I maintain concrete pavers in NZ’s outdoor environment?
Sweep regularly, wash with water, and reseal every 2–3 years. Remove weeds or moss with vinegar or eco-friendly cleaners. Replace any damaged pavers as needed.
Conclusion
Concrete pavers remain a reliable choice for outdoor projects in New Zealand, offering durability that withstands changing weather, affordability that suits a wide range of budgets, and design flexibility to match any style. Whether you’re planning a new driveway, garden path, or patio, choosing the right concrete option can make a noticeable difference in both function and appearance. If you’re ready to start your project, now is a great time to get quotes or speak with local concrete suppliers who understand what works best for NZ conditions. Got questions or unsure where to begin? Drop a comment or reach out, we’d love to hear about your project plans. You can also check out our related posts on sealing concrete pavers and easy DIY landscaping ideas to help you move forward with confidence.